FOLLOW ME ON INSTAGRAM!

Posted on

Hi everyone,

I know I’ve been MIA for quite sometime now. Honestly just so busy with school and work. I don’t have time to take all the pictures, set everything up, and write on the blog as much as I’d like. Please follow me on Instagram if you have it! I am always posting my meals and recipes on there. It is much quicker for me to post since I always have my phone on me. I will occasionally post here whenever I have the time. Thank you so much for your support the past 6 months. =)

Keep on the healthy lifestyle.

My Instragram is Jennd_le

JENND_LE

See you all there! =)

My Chips Alternative – Popcorn!

Posted on

Those who have been reading my blog know that I am a big, big CHIPS lover. When I gave up chips after the New Year, I knew I would have to invent something to satisfy my chip craving. I bought my sister this antique popcorn machine a few Christmas ago and decided to bring it back out. I bought a bag of popcorn kernels from Trader Joe’s. They are organic and only $1.99 per bag! Pretty big too…should give you about 20 servings at least. I seasoned the popcorn with melted vegan butter (Earth Balance), sea salt, paprika, and a big load of nutritional yeast. I coated the popcorn and OMG, they are to die for. Salty and buttery! Way HEALTHIER than chips and tastes better too! Definitely satisfies the salty crunch cravings. You guys need to try this out. It’s fantastic!

Salty, Cheesy Popcorn
– Top plain popcorn with melted vegan butter, salt, paprika, and nutritional yeast depending on your liking!

popcorn
Namaste,
Jenn

Dessert – The Most Delicious Lemon Bars

Posted on

I love lemon bars. There is nothing better than a golden buttery crust with a goooey oooey lemony middle and a little powder sugar dusted on top. My aunt has passed down her famous lemon bar recipe and I wanted to share it with you guys. These are theeeee BEST lemon bars I have ever had! Be careful because they are SO ADDICTING and not very healthy..but a very awesome and easy dessert to prepare to please a whole crowd.

Ingredients:
lb1
Crust:
– 1 cup cold butter. (I stick mine into the freezer for at least an hour or two before)
– 1/2 cup powder sugar
– 1/2 tsp salt
– 2 cups all-purpose flour

Filling:
– 1/2 tsp baking powder
– 1/4 cup all-purpose flour
– 4 eggs
– 2 cups granulated sugar
– juice of 1 large lemon
– zest of lemon (about 2 tbsp)
– powder sugar for dusting

1.Preheat oven to 350 degrees F.
2. Combine powdered sugar, salt, and flour in a bowl. Mix the ingredients.
3. Use a grater and grade the butter into the bowl. Use a fork to cut into the butter if needed until it looks like fine meal.
lb2
4. Put foil over a 9 in by 11 in pan so the bars come out easily.
5. Press the mixture into the pan.
6. Bake the crust for 20 minutes.
7. While the crust is baking, work on your filling.
8. Combine flour and baking powder in a small bowl.
9. Combine egg and sugar into another small bowl. Beat with a whisk until full incorporated.
10. Add the flour and baking powder into the egg and sugar in small amounts while whisking each time.
11. Whisk in the lemon juice and zest.
12. Pour the filling over the crust and bake for another 20 minutes.
13. Let the bar cool COMPLETELY, at least 3 hours before removing from the pan and cutting into the bars.
14. Dust with powder sugar.
15. ENJOY!
lb4

**Update on my NO DAIRY/NO CHIPS month. 01/07-01/13
So far, so good. I did slip on Monday because I drank some boba milktea without even realizing it. I only drank half and gave the rest to my sister once I realized it. After that, I haven’t slipped! =) So proud of myself…I’m thinking of what resolution I’m going to do for the next month and I’m thinking I’m going to give up sweets. Not being able to eat/drink dairy, I find myself looking for vegan desserts which are not necessarily healthier! How’s everyones’ resolutions going?? Are you guys keeping up with them? Keep me posted!

Namaste,
Jenn


Creamy Mushroom Risotto

Posted on

If you’ve ever watched Hell’s Kitchen, you’d think that risotto is one of thee hardest thing to master. Seems as if the chefs on the show have trouble making risotto. However, risotto isn’t hard necessarily. It just takes a LOT of time, presence, and persistence. I found a mushroom risotto on all recipes.com that had great reviews so I decided to alter it to my liking. The risotto turned out great. Creamy and flavorful. It would be a great side to serve to your family.

Servings: 6

Ingredients:
– 6 cups vegetable stock
– 2 tbsp olive oil
– 2 large portebella mushrooms
– 8 oz crimini mushrooms
– 2 shallots
– 1 1/2 cup arborio rice
– 2 tbsp chopped chives
– 4 tbsp unsalted butter
– 1/3 cup grated parmesan cheese
– salt and pepper to taste

This recipe will take 40-50 minutes so make sure you have the time to stand there and stir the rice. Haha
risotto risotto2

1. Bring vegetable stock to a simmer. You don’t want it boiling but you want it hot. VERY IMPORTANT TO HAVE HOT STOCK.
2. Clean and chop mushrooms.
3. Bring a large pan to medium high heat and put in olive oil.
4. Sautéed mushrooms until cooked and soft. Remove from pan.
5. Chop shallots.
6. Add a little bit of olive oil and toss in shallots. After 2 minutes, toss in arborio rice. Toss rice until it’s a golden color.
7. Add one ladle (1/2 cup) of vegetable stock and stir. Continue to add the stock one ladle at a time after the one before has evaporated. You need to stand next to the stove and stir the ENTIRE time. DO NOT LEAVE IT UNATTENDED!
8. Once the rice is cooked and to the consistency of your liking, add in the mushrooms (along with the mushroom water), butter, cheese, chives, pepper, and salt.

Risotto usually has the consistency of a porridge. When you put a spoon against the pan and scrape it towards you, the rice should part but then melt back into the center. I like my risotto to be a little thick. Many may think that it’s a goopy mess but that’s how I like it! Haha. So make it to how you like it, if you like it more loose and watery then add more stock, if you don’t then don’t add as much.

It’s amazing and perfect on a cold day.

Namaste,
Jenn

Food Recipe: Pan-seared Salmon

Posted on

Boyfriend and I was craving salmon a couple of days ago so I woke up early, went to the supermarket, and started on the recipe at 10:00 AM! I wanted the salmon to marinate for as long as possible…we actually didn’t cook it until about 6:30PM! The recipe turned out SO delicious. The marinate really seeped through the salmon and gave it great flavor. I wanted to share this recipe with you guys. It really is amazing and easy, easy to make. Salmon is a great source of protein and little fat. So healthy for you and so delicious!

Servings: 8
Ingredients:
salmon
– 2 pounds of salmon.
– Juice of 1 lemon
– 3 cloves of garlic
– 1/4 cup vegetable oil
– 1/3 cup water
– 1/4 cup soy sauce
– 1/3 cup brown sugar
– Pepper to taste
– Salt to taste

1. Clean the salmon and pat it DRY.
2. Divide and cut salmon fillet into 8 pieces, as equal as possible.
3. Salt both sides of the salmon fillets.
4. Place salmon into a plastic bag.
5. Stir lemon juice, vegetable oil, water, soy sauce, brown sugar, and pepper into a bowl.
6. Pour the marinade into the bag and throw in 3 cloves of crushed garlic (not chopped).
7. Seal the bag and marinate for at least 1-2 hours. The longer the better.
Salmon2
8. Bring your pan to a medium high heat and put in about 2 tbsp of vegetable oil.
9. When oil is hot, put in the salmon fillet skin side down.
10. Cook for about 5-6 minutes depending on the thickness of the salmon. Skin of salmon should be CRISPY.
11. Flip it and cook on the other side for 4-5 minutes until brown glaze appears.
12. Serve immediately and enjoy! =)
Salmon3

This recipe is also great for grilling or baking.

Hope you guys enjoy this recipe! BTW, I forgot to ask, what are you resolutions for the new year??

Namaste,
Jenn


Happy New Year, My New Years’ Resolutions, & Roasted Vegetable Recipe

Posted on

First of all, I want to wish everyone a happy new year. I realize that I’ve been slipping updating my blog and I will do my best to post 2-3 times a week for everyone. Last January, boyfriend and I gave up eating meat. This included: chicken, beef, pork, lamb, etc. We still eat seafood occasionally. I am so proud that we have kept up with it and cannot wait to conquer another year. It is not longer a struggle but part of our lifestyle. This year, as I was thinking of resolutions to set for the New Years, I decided that I’m going to conquer ‘monthly’ resolutions instead. Having a long list of resolution for the new year can be extremely overwhelming. And to be honest, who keeps up with the resolutions for the entire year? Resolutions tend to fail within the first month. I decided that I’m going to have a new goal for every month and commit to it for the 30-31 days, which is still a LONG time! These resolutions can be anything that would be make me become a better person. If I enjoy the outcomes within that month, than I will continue with it. If I don’t enjoy it, I can always stop or adjust it to my liking. “Diets”, food, exercise, hobbies, and service is all an experiment to me. Try it, commit to it, and if you like it, stick with it. If not, change it. No need to beat yourself over something that doesn’t work for you. Acknowledge the uncomfortable and move on.

JANUARY 2013: Give up dairy and chips.
I’ve always wonder how it would feel to not eat dairy so I’m going to experiment with it. I’ve done some research and there are many benefits to not consume it. I’m going to have to do even more research to ensure that I’m getting enough calcium and nutrients in order to get the essentials that my body needs. Chips has always been my weakness and I KNOW it is not very healthy. I want to challenge myself to find healthier alternative. This is going to hard for me because I’m always craving salty crunchiness. I’m going to do weekly updates so that I can hold myself accountable.

Week 1 – Jan 01 – Jan 06
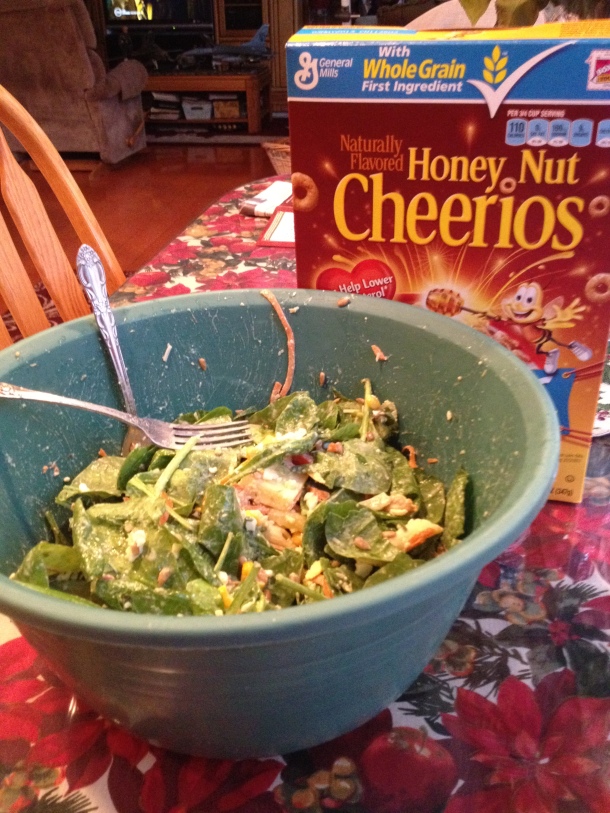
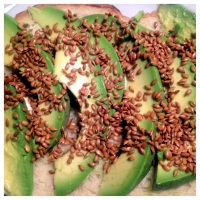
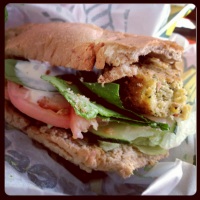
Giving up chips has been easy. I’ve been able to find healthier, baked crackers to satisfy my salty craving. Eating them with hummus or homemade guacamole gives me a satisfying snack. Giving up dairy has been HARD, HARD, HARD. I LOVE CHEESE. I make bomb bean and cheese burritos that my family LOVES and they constantly eat it in front of me! I’ve learned to substitute cheese with avocados and also discovered an awesome vegan cheese – daiya. Boyfriend and I actually made vegan pizza yesterday! Will post the recipe for that soon; it was delicious. I also have a fat sweet tooth and can’t have any of the store bought stuff. I usually have a piece of chocolate everyday and giving that up has been hard. So far I’ve made healthy oatmeal raisin and snickerdoodle to help with my cravings. Both with vegan butter of course. Also, went to Whole Foods yesterday! Boyfriend and I got two vegan donuts: blueberry & crumb, and a german chocolate walnut cookie. All 3 were delicious! Thank you whole foods!

Oopsie Moment
I accidentally ate dairy ONCE. Boyfriend made toasted up some waffles with peanut butter for breakfast today and I forgot to look at the labels. Dove right into it and then realized that it was made with milk. =( But it’s okay. I’m going to keep going with it. Slipping up once doesn’t mean that your whole day is ruined. Many people tend to just give up and say that “they’ll start again tomorrow”. Haha. It’s okay, I’ve been guilty of that too. Continue RIGHT NOW. Slip ups happen. Don’t let them discourage you! =)

Finally, a new recipe from me: Roasted Vegetables.
This recipe is absolutely DELICIOUS. I can just eat them as a snack and be happy. Here is what you need…

Ingredients:
– 1 butternut squash
– 5 shallots
– 1 fennel bulb
– 4 garlic cloves
– 1 asparagus bunch
– 4 tbsp olive oil
– 4 tbsp balsamic vinegar
– salt & pepper to taste

1. Preheat your oven to 400 degrees F.
2. Chop your butternut squash into bite size pieces. The smaller the pieces, the faster they will cook.
3. Quarter your shallots.
4. Slice the fennel bulb into small slices.
5. Chop and rinse asparagus into 2-inch pieces.
6. Toss your butternut squash, shallots, fennel, and garlic with the olive oil & balsamic vinegar.
7. Place it in the oven for 20 minutes.
8. Toss the asparagus into the oven and roast for another 20-25 minutes; until butternut squash is soft. (toss the other vegetables as well so the other sides can touch the pan!)RoastedVeggies1
RoastedVeggies2
RoastedVeggies3
Roasted Veggies 4

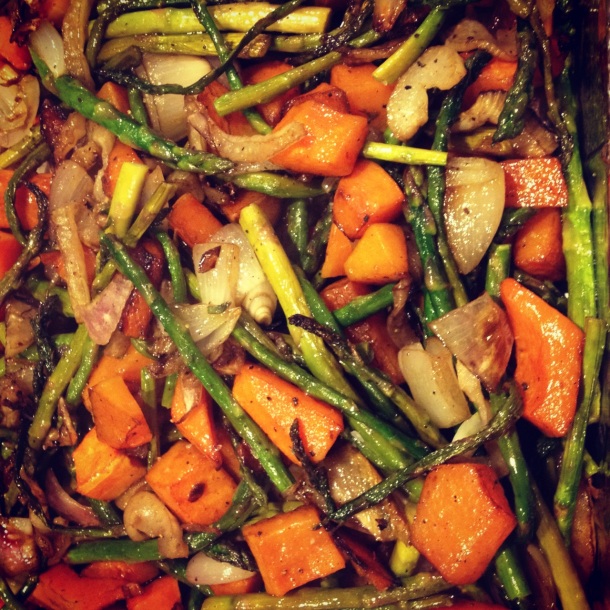
Tip: use a large baking pan. don’t crowd the vegetables on top of one of another. You want the sides to touch the pan because that’s where it is hottest. You’ll get a nice golden carmelization on the sides. Do it in two batches if you have to.

Please, please try out this recipe and let me know how you like it. It is seriously DELICIOUS!

Food Recipe: 8 Layer Magic Bars!

Hi everyone! I hope everyone had a nice Christmas. Mine was awesome. I got to spend two days with my family, friends, and boyfriend. Couldn’t have asked for a better time. I’ve missed you guys…haven’t blogged in awhile. Today I have a dessert recipe for you guys. This is NOT a healthy recipe…but a hit for those sweets-lovers. Hey, it’s okay to indulge and treat yourself a little…especially with the holidays! =)

I call these my 8-layer magic bars…I got the recipe from a friend and modified it a little bit. Here’s what you need.

Ingredients:
magic bars1
– 12 graham crackers – make it into crumbs (I used a food processor)
– 3/4 cup unsweetened butter (melted)
– 2/3 cup walnuts
– 2/3 cup pecans
– 2/3 cup  semi sweet chocolate chips
– 2/3 cup white chocolate chips
– 2/3 cup butterscotch chips
– 1 cup coconut flakes
– 1 14.5 oz can of condensed milk

1. Preheat your oven to 350 degrees.
2. Toast your coconut flakes. Be sure to check and stir every TWO minutes. They burn VERY VERY fast. I forgot the first time and out come black coconut flakes..Haha. Once they’re browned and toasted, take them out.
magic bars2
3. Combine the melted butter with crumbs. Once all incorporated, press down into a 13 x 9 pan. Foil it to ensure that the bars will not stick!
magic bars 3
magic bars4
4. Sprinkle, walnuts, pecans, semi-sweet chocolate chips, white chocolate chips, and butterscotch chips. Make sure you do it in this order.
magic bars5
magic bars 6
5. Pour the condensed milk all over. The condense milk makes everything come together.
magicbars8
magicbars7
6. Sprinkle on your coconut flakes on top.
7. Stick it in the oven for 20-25 minutes until the edges are brown. Let it cool COMPLETELY, about 3-4 hours before you take it out to cut or else it will crumble and fall apart.
8. ENJOY! =)
magic bars9
magicbars10

I have tons of recipes coming up. Been cooking up a storm and can’t wait to share them with you guys. Have a happy new years everyone! I have a special idea coming up. 😉

PS. I’ve been noticing that my links on other pages don’t work…they’ll work for the first day and then take people to a ‘nonexistence’ area. Anyone know how to fix that? I link the permalink and sometimes short link. They both do that after time =(

Namaste,
Jenn

Food Review: Vegetarian House – San Jose, CA

Vegetarian House is located in downtown San Jose, CA. It has been around for 20+ years! Boyfriend and I just started going there this year after we stopped eating meat. Many of my friends call it a “cult house” and when you walk in, you’ll know why. Seems like all the workers idolize this lady that they consider their God. Her picture is everywhere on the walls. I’m not sure what her way of life is; however, I don’t really pay attention to it while I eat there. This restaurant uses all organic items when they can which is awesome. My favorite dish to get there is the Pesto Divine and let me tell you, it is very DIVINE. It comes with chicken strips in a toasted hot baguette bread. They put vegannaise, tomatoes, lettuce, and pesto in it and it’s very tasty. The sandwich comes with soup and salad but I always substitute for fries..=X Haha to be honest, I don’t really like their soups that they give and the salads alright…Boyfriend got the jolly burger. This burger is quite interesting…it comes with crispy chik’n nuggets (as the m aeat), mushrooms, tomatos, pickles, and lettuce with french fries as well. It is very delicious. Their fries are so good; they are steak fries with seasonings and herbs on them. Yum! I’ve been to this restaurant maybe 10 times. Their food and service has always been good. Sometimes when I come on an off day, the service is extremely slow but they always apologize and are nice about it. Another dish that I recommend (not pictured) is the Sea Fruit Grill. It is fake fish and comes with all these vegetables and rice paper. You actually make the spring rolls yourself! Delicious and fun to share with a group of people. =) Hope you guys try out the restaurant when you get the chance!

Veghouse1 Veghouse2


Namaste,
Jenn

Yoga Pose of the Week: Dhanurasa (Bow Pose)

Dhanurasana Dhanurasana 1

This week’s pose of the week is Dhanursana. This pose increases the strength and flexibility along the entire spine. It stretches the neck, shoulders, arms, and legs. It helps improve the digestion and increases the appetite. Great for relieving constipation as it massages the digestive organs. It helps regulate the pancreas and expands the thoracic region of the chest. (yoga108.org)

How to get into this pose:
Lay flat on your stomach with your chin or forehead on the floor. Start by tensing up your upper leg. Your leg should pop off the floor. Next, suck in your core. It will lift your stomach off the mat. Reach back for the outside of your ankles. If you can’t reach for both, try to reach for just one or get the teacher to help you. Inhale and kick your legs while holding your ankles; your knee will lift as much as they can. Lift up your head and chest. Try to keep your elbows straight and arch your back as much as you can. Hold the posture for 10-30 seconds without holding your breath. Exhale and release your legs while place your arms on both sides of your body. Repeat 3 times and then get into child pose to counteract it.

This is how I do it. I’m not a professional or anything and be sure to ask your doctor/yoga teacher if this is okay for you to do. Be sure to listen to your body. If you feel any pain, STOP.

Hope you find this helpful.

Namaste,
Jenn

Food Review – Sweet Tomatoes (Take-out)

Hi!

So glad you guys liked the ramen post yesterday. Ramen may not be the healthiest thing but when prepared right, it can be a great healthier alternative to junk food. Needless to say, it is savory and satisfying, especially during those cold winter nights.

Today, I’m going to do a restaurant reviews for Sweet Tomatoes. Sweet Tomatoes is a franchise so there are many locations all over the world. It is buffet style; they offer a wide range of soups, bakery goods, pasta, and a huge salad bar. The only time boyfriend and I eat Sweet Tomatoes now is when we get take out. When we are craving the breads/pasta/salads — the whole shabang, we get the $9.79 deal which gives us a large container of salad, a small bag for breads/muffins, and two 8 oz containers for soup/pasta. The only thing bad about take-out is you don’t get to try all the soups since you only get two containers and the bakery bag is really small so you can’t a lot. Majority of the time, we just get one salad container as our takeout. A salad container is about $5.89 and it is SO SO SO worth. I cannot stress it enough! Their salad bar is 45 feet long – containing, about 5 freshly prepared salad (caesar, summer medley, asian chicken salad, spinach and strawberries, etc..they make it every 30 mins and alternate the flavors depending on the season, and make you own fixings such as spinach, tomatoes, cucumbers, carrots, potato salad, tuna salad, egg, seeds, mushrooms, anything you can think of to put on a salad.

Boyfriend and I are able to get full off ONE take-out container making it about $3 for each of us! We are STUFFED. When we eat in, we usually don’t eat much and it’s 9.49 a person, totaling the meal to $20! But no, we’re cheap so we take out for $6. Haha!

Here’s pictures of our take-out last week….st1st2
st4

I wanted to put the salad bowl next to the cereal box so you guys can get a feel of how big this salad was!
What I put in my salad: a tiny bit of caesar salad, a whole bunch of baby greens and spinach, tomatoes, cucumbers, potato salad, tuna salad, egg, sunflower seeds, corn, and pasta. I don’t like to add the prepared salads because those add a ton of calories and plus when I put all the potato/tuna salad and toppings, those give it a TON of flavor already. Putting the topping over a bunch of prepared salads make the taste too strong and flavorful to me. But cmon, is that big tub of a salad a great deal for $6?? You can bet I stuff it as much as I can! Haha

You guys should go to sweet tomatoes…and get take out! I don’t think it’s totally worth it eating in and paying triple, quadruple, or however depending on how many people are eating. Plus this way, you won’t be stuffing your face with all the pastries! Have a good day everyone!

Namaste,
Jenn

EATBREATHEYOGINI

Healthy Pescatarian, Vegetarian & Vegan Recipes + Yoga

Emmy Cooks

favorite recipes from a Northwest kitchen

Small Potatoes

Because in MY life, these things are no small potatoes

RelaxingCooking

Trasforma la tua cucina in un'oasi di emozioni positive

Avocados and Ales

Vegan cooking from the Midwest

The Healthy Epicurean

Life in rural France and fun, nutritious eating ideas since 2012